Amazon has reduced their AWS prices again. Hourly instances have been reduced by anywhere from 2% to 30% depending on the instance type and location. Outbound bandwidth prices have been reduced anywhere from 26% to 83% depending on the location you’re using.
You can see read their announcement for all of the details.
Tag: Amazon AWS
Amazon Lowers S3 pricing
It seems like Amazon is always giving you more bang for your buck. Today, they reduced S3 pricing. Here is how they’re changing effective Feb. 1:
Old New
First 1TB $0.140 $0.125
Next 49TB $0.125 $0.110
Next 450TB $0.110 $0.095
Next 500TB $0.095 $0.090
Next 4000TB $0.080 $0.080 (no change)
Over 5000TB $0.055 $0.055 (no change)
Here is where you can get full Amazon S3 price details for all regions.
Amazon AWS announces Support for DynamoDB
I logged into one of my AWS accounts this morning and what did I see? A brand new feature staring at me!
As it says, DynamoDB is a “Fast, Predictable, Highly-Scalable NoSQL Data Store” Which really means a highly available key-value store. Amazon has been using DynamoDB for the underlying storage technology for core parts of amazon.com for years.
Here’s Amazon’s page on DynamoDB.
You can read more technical details about DynamoDB here – http://www.allthingsdistributed.com/2007/10/amazons_dynamo.html
How to configure your Postfix server to relay email through Amazon Simple Email Service (SES)
Amazon recently announced SMTP Support for the Amazon Simple Email Service (SES) which is very cool. Now you can configure your server to send email through it regardless of what platform your site is built in (my previous post was only relevant to PHP servers) There are 3 main things you need to do to configure your Postfix server to relay email through SES: Verify a sender email address, create an IAM user for SMTP and configure your server to use SES.
Verify a sender email address
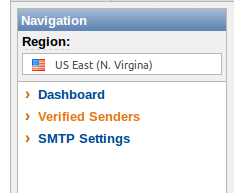
- In the SES section of the AWS Management Console, click on “Verified Senders”:
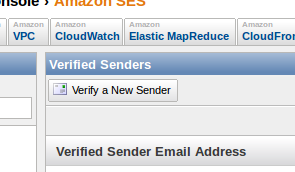
- Then click on the “Verify a New Sender” button:
- Enter the Sender’s Email Address and click “Submit”:

- Then you’ll see the confirmation message:

- Go to that email account and click on the link Amazon will email to you to confirm the address.
Create IAM Credentials
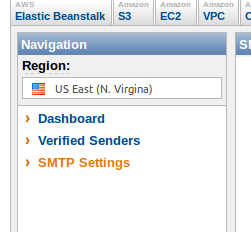
- In the SES section of the AWS Management Console, click on “SMTP Settings”:
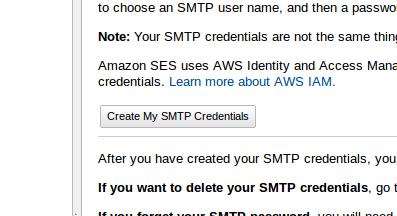
- Click on the button “Create My SMTP Credentials”:
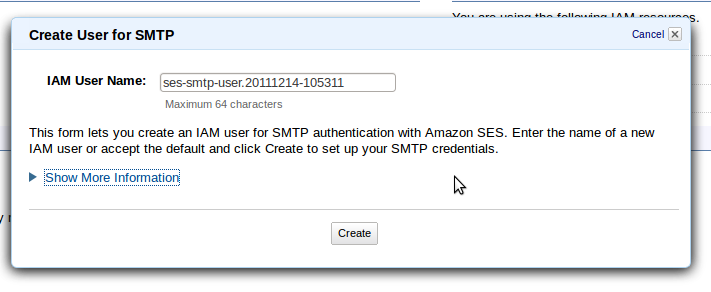
- Choose a User Name and click “Create”:
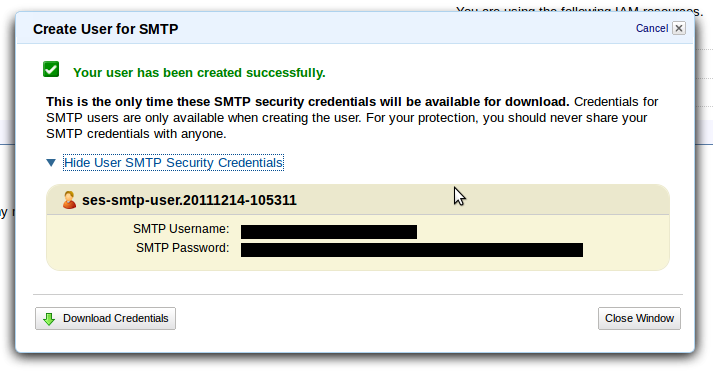
- Save the SMTP Username and SMTP Password that are displayed . We’ll need them when we’re configuring the server.
Configure the server
Now for the fun part. Here I assume you’re running Postfix as the MTA on your server.
- Install stunnel:
apt-get install stunnel - Add these lines to
/etc/stunnel/stunnel.confand make sure it starts properly (you may have to edit/etc/default/stunnel so that it starts automatically on boot):
[smtp-tls-wrapper]

accept = 127.0.0.1:1125

client = yes

connect = email-smtp.us-east-1.amazonaws.com:465 - Add this line to
/etc/postfix/sender_dependent_relayhost:
[email protected] 127.0.0.1:1125 - Generate the hashfile with this command:
postmap /etc/postfix/sender_dependent_relayhost - Add this line to
/etc/postfix/password:
127.0.0.1:1125 <your SMTP Username>:<your SMTP Password> - Fix the permissions on
/etc/postfix/password
chown root:root /etc/postfix/password

chmod 600 /etc/postfix/password - Generate the hashfile with this command:
postmap /etc/postfix/password - Add these lines to
/etc/postfix/main.cf:
sender_dependent_relayhost_maps = hash:/etc/postfix/sender_dependent_relayhost

smtp_sasl_auth_enable = yes

smtp_sasl_password_maps = hash:/etc/postfix/password

smtp_sasl_security_options = - Load the new configuration with this command:
postfix reload
Additional Notes
After setting it up, look closely at the mail logs on your server to verify that they are being delivered properly. As I found through testing, in certain misconfigurations your email will not be delivered and will not remain in the queue on the server. The mail logs are the only place that will indicate that delivery is failing.
If you need to add other senders in the future, edit /etc/postfix/sender_dependent_relayhost accordingly then run:
postmap /etc/postfix/sender_dependent_relayhost

postfix reload
The reason for using sender_dependent_relayhost is because you want to specify what email gets sent through SES. If you try to send all email from the server through SES, you’ll probably have some end up going into a black hole. When I was testing this previous to using sender_dependent_relayhost, I didn’t have my root@ email address verified and so emails ended up bouncing back, then bouncing into oblivion never to be seen again (because it would try to relay email to root@ through SES too.)
http://www.millcreeksys.com/how-to-configure-your-postfix-server-to-relay-email-through-amazon-simple-email-service-ses/
MySQL Replication to EC2
Servers die. People make mistakes. Solar flares, um, flare. There are many things that can cause you to lose your your data. Fortunately, there is a pretty easy way to protect yourself from data loss if you use MySQL.
My preferred solution is to store a copy on EC2 through replication. One big reason I like to replicate to EC2 is that it becomes a pretty easy warm-failover site. All of your database data will be there, to switch over you’ll just need to start up webservers or other systems required by your architecture and make a DNS change. If your datacenter became a smoking hole in the ground, you could be back up and running on EC2 in 15 minutes or less with proper planning.
No matter where your MySQL master server is hosted, you can replicate to an EC2 instance over the internet. Latency generally isn’t an issue when compared to the lag that may be introduced by the replication process itself. I typically see a max of 5-10 second replication lag during general use. That lag is due to the replication process being single-threaded (only one modification is made to the database at a time.)
Here are a few things to keep in mind when setting up replication:
- Use a separate EBS volume partition for your mysql data directory
- There is good replication documentation for MySQL
- Use SSL
- Set expire_logs_days to an acceptable value on the slave and server. The value of this setting will vary depending on the volume of data you send to the slave each day. Don’t make it so small that recovery with the binlogs will be difficult or impossible.
- Store your binlogs on the same partition as the mysql data directory. This simplifies the snapshot and recovery process.
Here’s a sample EBS snapshot perl script for MySQL that can be modified and used to create snapshots of the mysql data on the slave server:
Since this is a mysql slave server, you can create volume snapshots whenever you want without any impact on your master database. By default, AWS imposes a 500 volume snapshot limit. If you have that many snapshots, you’ll have to delete some before you will be able to create more.
With the periodic snapshots and binlogs, you can recover to any point in time. I’ve been able to recover from a “bad” query that unintentionally modified all rows in a table as well as accidentally dropped tables.
Can you replicate from multiple database servers to a single server? Yes, but a rule of replication is that a slave can only have one master. To make it possible for one server to be a slave to multiple master servers you need to run multiple mysql daemons. Each daemon runs with its own configuration and separate data directory. I’ve used this method to run 20 mysql slaves on a single host and I’m sure you could run many more than that.
Millcreek Systems is available to help you setup and maintain MySQL replication for you. Please contact us if you’d like to discuss our services further.
